| Gail Yamada compiled and indexed many scenes and DEMs before leaving the University. Harvey has explored the Tsangpo and Siang scenes, and incorporated them in the atlases used in the Tsangpo Expedition and the 2008 Siang expedition. Some work was also done with Carajas (ASTER_DEM20020717160053.hdf), SE Brasil and Hammersley. |  |
| AST_L1A_00312182004042129_20080228200519_28393.hdf |  |
| AST_L1A_00312182004042137_20080228200519_28391.hdf | |
| AST_L1B_00311252007042137_20080212224245_29851.hdf | |
| AST_L1B_00311252007042145_20080212223945_28365.hdf | |
| AST_L1B_00311252007042154_20080212223945_28370.hdf | |
| AST_L1B_00311252007042203_20080212223945_28372.hdf | |
| AST_L1B_00312182007042801_20080212223925_28077.hdf | |
| AST_L1B_00312182007042809_20080212223925_28079.hdf | |
| AST_L1B_00312182007042818_20080212223915_27722.hdf | |
| AST_L1B_00312182007042827_20080212223915_27720.hdf |
- AST_L1A_00305082007191258_20080411001719_8492.hdf
- AST_L1A_00305082007191307_20080411001659_8203.hdf
- AST_L1A_00307252007192526_20080411001659_8207.hdf
- AST_L1A_00307252007192535_20080411001709_8387.hdf
- AST_L1A_00308252006191239_20080411001659_8220.hdf
- AST_L1A_00308252006191248_20080411001719_8497.hdf
- AST_L1A_00309012006191848_20080411001709_8385.hdf
- AST_L1A_00309012006191857_20080411001719_8500.hdf
- AST_L1A_00310132007192520_20080411001659_8213.hdf
- AST_L1A_00310132007192529_20080411001659_8217.hdf
| AST_L1A_00304272003190446_20081216231255_1456.hdf | 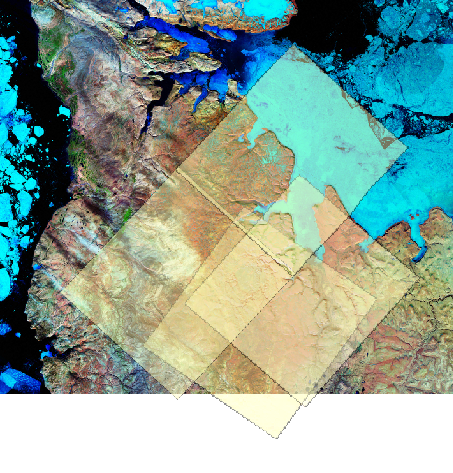 | 
|
| AST_L1A_00304272003190455_20081216231255_1461.hdf | ||
| AST_L1A_00305052007183409_20081216231255_1451.hdf | ||
| AST_L1A_00305272005185753_20081216231255_1463.hdf |
| AST_L1A_00302132004142036_20081121221028_16349.hdf | 
|
| AST_L1A_00302132004142045_20081121221018_16288.hdf | |
| AST_L1A_00302132004142054_20081121221018_16293.hdf | |
| AST_L1A_00302242008141956_20081121221018_16296.hdf | |
| AST_L1A_00302242008142005_20081121221028_16356.hdf | |
| AST_L1A_00302242008142014_20081121221028_16353.hdf |
| AST_L1A_00303102002212017_20080419200353_11473.hdf | 
|
| AST_L1A_00306052005070846_20080419200343_11124.hdf | |
| AST_L1A_00306242000213400_20080419200403_11807.hdf | |
| AST_L1A_00306272002072321_20080419200343_11120.hdf | |
| AST_L1A_00307082003213657_20080419200343_11125.hdf | |
| AST_L1A_00307142005071525_20080419200343_11136.hdf | |
| AST_L1A_00307142005071534_20080419200353_11483.hdf | |
| AST_L1A_00308092005211749_20080419200353_11475.hdf | |
| AST_L1A_00304272006213646_20080520141942_22183.hdf | |
| AST_L1A_00305052002070515_20080520141942_22188.hdf | |
| AST_L1A_00305052002070524_20080520141942_22185.hdf | |
| AST_L1A_00305182002213849_20080520141932_21919.hdf | |
| AST_L1A_00305182002213858_20080520141942_22179.hdf | |
| AST_L1A_00307082003213648_20080520141922_21614.hdf | |
| AST_L1A_00307082003213657_20080520141932_21912.hdf | |
| AST_L1A_00305182002213832_20080519085945_10223.hdf | |
| AST_L1A_00305182002213841_20080519085946_10234.hdf | |
| AST_L1A_00307082003213630_20080519085935_8198.hdf | |
| AST_L1A_00307082003213639_20080519085935_8192.hdf | |
| AST_L1A_00301142006212927_20080331042347_6213.hdf | |
| AST_L1A_00301142006212927_20080411060645_2737.hdf | |
| AST_L1A_00301142006212936_20080411060635_2689.hdf | |
| AST_L1A_00301142006212945_20080411060615_2589.hdf | |
| AST_L1A_00301142006212953_20080411060645_2740.hdf | |
| AST_L1A_00302082006212326_20080411060655_2860.hdf | |
| AST_L1A_00302272007212526_20080411060635_2686.hdf | |
| AST_L1A_00304082006210550_20080411100731_26620.hdf | |
| AST_L1A_00304082006210559_20080411060655_2863.hdf | |
| AST_L1A_00305082006211811_20080411100731_26623.hdf | |
| AST_L1A_00305082006211820_20080411060705_2909.hdf | |
| AST_L1A_00305082006211828_20080411060705_2912.hdf | |
| AST_L1A_00305222006213035_20080411060715_2957.hdf | |
| AST_L1A_00305242006211812_20080411060625_2637.hdf | |
| AST_L1A_00306152006071508_20080411060625_2640.hdf | |
| and more |
- AST_L1A_00302142009213831_20090504143657_30675.hdf
- AST_L1A_00302142009213840_20090504143647_30636.hdf
- AST_L1A_00302142009213849_20090504143647_30634.hdf
- AST_L1A_00303022009213832_20090504143637_30565.hdf
- AST_L1A_00303022009213841_20090504143657_30682.hdf
- AST_L1A_00304102009214440_20090504143637_30577.hdf
- AST_L1A_00304102009214449_20090504143637_30575.hdf
- AST_L1A_00304102009214458_20090504143637_30570.hdf
- AST_L1A_00311012008214355_20090504143657_30680.hdf
- AST_L1A_00311012008214403_20090504143637_30560.hdf
- AST_L1A_00312032008214408_20090504143647_30619.hdf
- AST_L1A_00312032008214417_20090504143647_30628.hdf
- AST_L1A_00312032008214426_20090504143647_30624.hdf
- AST_L1A_00301102009074051_20090505180531_23130.hdf
- AST_L1A_00301102009074100_20090505180531_23124.hdf
- AST_L1A_00301192009073451_20090505180531_23135.hdf
- AST_L1A_00301262009074055_20090505180531_23137.hdf
- AST_L1A_00302022009074707_20090505180541_23176.hdf
- AST_L1A_00302112009074056_20090505180521_23065.hdf
- AST_L1A_00302272009074056_20090505180521_23073.hdf
- AST_L1A_00309042008074023_20090505180521_23076.hdf
- AST_L1A_00310132008074628_20090505180521_23061.hdf
- AST_L1A_00311142008074625_20090505180521_23078.hdf
- AST_L1A_00312182008073439_20090505180531_23120.hdf
- AST_L1A_00301112004095252_20090325173638_26656.hdf
- AST_L1A_00302022003094659_20090325173628_26491.hdf
- AST_L1A_00302072005094504_20090325173628_26486.hdf
- AST_L1A_00302122004095234_20090325173648_26713.hdf
- AST_L1A_00303062004095833_20090325173648_26708.hdf
- AST_L1A_00304152001100811_20090325173638_26661.hdf
- AST_L1A_00305092003094556_20090325173638_26651.hdf
- AST_L1A_00305092003094605_20090325173638_26646.hdf
- AST_L1A_00305252003094604_20090325173628_26503.hdf
- AST_L1A_00305252003094613_20090325173628_26501.hdf
- AST_L1A_00306012003095214_20090325173628_26496.hdf
- AST_L1A_00306242003095757_20090325173658_26763.hdf
- AST_L1A_00306242003095806_20090325173658_26761.hdf
- AST_L1A_00307102003095730_20090325173648_26720.hdf
- AST_L1A_00307212004095119_20090325173638_26663.hdf
- AST_L1A_00307212004095137_20090325173648_26702.hdf
- AST_L1A_00309212003095127_20090325173648_26718.hdf
- AST_L1A_00302142003140849_20090522132644_5720.hdf
- AST_L1A_00302162003135625_20090522132444_3648.hdf
- AST_L1A_00302172003143922_20090522132654_5969.hdf
- AST_L1A_00302202003150945_20090522132234_2770.hdf
- AST_L1A_00302262003210311_20090522132644_5718.hdf
- AST_L1A_00302262003210319_20090522132654_5971.hdf
- AST_L1A_00312082002210353_20090522132654_5959.hdf
- AST_L1A_00312082002210402_20090522132244_2808.hdf
- AST_L1A_00312102002142128_20090522132644_5713.hdf
- AST_L1A_00312282002203909_20090522132654_5954.hdf
- AST_L1A_00312282002203918_20090522132704_6121.hdf
- AST_L1A_00312292002145144_20090522132654_5963.hdf
- AST_L1A_00312292002145144_20090522132704_6124.hdf
- AST_L1A_00305062003005941_20090616121346_28873.hdf
- AST_L1A_00309052001010532_20090616121346_28856.hdf
- AST_L1A_00309052001010541_20090616121346_28860.hdf
- AST_L1A_00309052001010550_20090616121346_28865.hdf
- AST_L1A_00309052001010559_20090616121346_28871.hdf
- AST_L1A_00309132003004535_20090616121356_28911.hdf
- AST_L1A_00309152007005248_20090616121336_28812.hdf
- AST_L1A_00310152004005816_20090616121336_28811.hdf
- AST_L1A_00310152004005825_20090616121336_28810.hdf
- AST_L1A_00310172008010555_20090616121336_28816.hdf
- AST_L1A_00310262008005914_20090616121336_28814.hdf
Note to Adam I went ahead and imported the data because this is the first image that anyone ordered in both formats. This is interesting:
a) Arcmap can read the HDF file directly. That gives you the 4100x4200 pixel VNIR data at sensor resolution, with an affine transformation to approximate lat-long space. If you zoom in, you see that pixels are tilted.
b) The tiff files are that you ordered are the same size. They are displayed a few pixels out of register with HDF layer.
c) When 3 tiff images are composited into a gridstack, they are 4934x4200 pixels as a tilted rectangle in a square edged with no-data cells.
d) When 3 tiff images are composited into an img file, there are 4100x4200 pixels, and they are rectangular.
e)When the HDF files are processed by silcast, they are projected to UTM and orthorectified. They are 4992 by 4776 pixels as a tilted rectangle within another rectangle. The image bands and the DEM cover a smaller area than the raw image. Only HDF files can be input to silcast.